

How to Use Descript for Video Editing: Complete Tutorial for Creators
Learning how to use Descript for video editing can seriously speed up your content workflow. Instead of wrestling with layers and razor tools, Descript gives you a text-first editing experience — edit the transcript and the video follows. Whether you’re a YouTuber, podcaster, course creator, or social media manager, this Descript tutorial for beginners will help you move from raw footage to polished publish-ready videos faster.
What Makes Descript Different for Video Editing
Descript flips the usual editing model on its head. Instead of starting from a timeline and clips, you get an automated transcription of your audio/video and edit like you would edit a document. Delete a sentence in the transcript and the corresponding video/audio cut disappears. This text-based video editing approach is the core differentiator.

Key benefits at a glance
- Speed: Edit spoken content by editing text — much faster than manual trimming.
- Simplicity: Minimal learning curve for creators who can type.
- Accurate automated transcription: Speeds up editing, captions, and search.
- Multitrack capabilities: You can still do timeline edits and layer B-roll, music, and effects.
- Collaboration tools: Share projects and invite teammates for comments and real-time edits.
Best use cases
Descript shines for:
- Interview-style videos and talking-head content (YouTube, LinkedIn).
- Podcasts and repurposed video-to-audio workflows.
- Screen recordings, tutorials, and course videos where spoken word drives the edit.
- Quick social clips and captions for reels and TikToks.
How it compares to traditional video editing software
Traditional editors like Premiere Pro or Final Cut Pro give you pixel-level control — great for VFX and complex color grading. Descript is different: it prioritizes speed and narrative clarity. Use Descript when dialogue is the star and you want to produce polished content quickly; switch to timeline editors for heavy visual effects, frame-by-frame animation, or film-grade grading.
Getting Started with Descript (Setup & Interface)
This section walks you through installing Descript and understanding the main workspace so you’re not lost when you open a new project.
Download and Install Descript
System requirements (quick):
- macOS and Windows supported (check Descript site for latest OS versions).
- Decent CPU and at least 8GB RAM recommended for smooth multitrack editing.
- Stable internet during transcription and Cloud collaboration.
Free vs Paid plans (short):
- Free plan typically includes a limited amount of transcription and may watermark exports.
- Paid plans unlock higher transcription minutes, Overdub access (AI voice cloning), higher-quality exports, and team collaboration features. (Check Descript for current plan names and pricing.)
Account creation process (simple steps):
- Visit Descript’s website and click Get Started.
- Sign up with email or a Google account.
- Verify your email and choose a plan or start with the free tier.
- Download the desktop app for macOS or Windows and sign in.
Tip: Start on the free plan to explore automated transcription, text-based editing, and Studio Sound. Upgrade when you need more export minutes, Overdub, or team features.
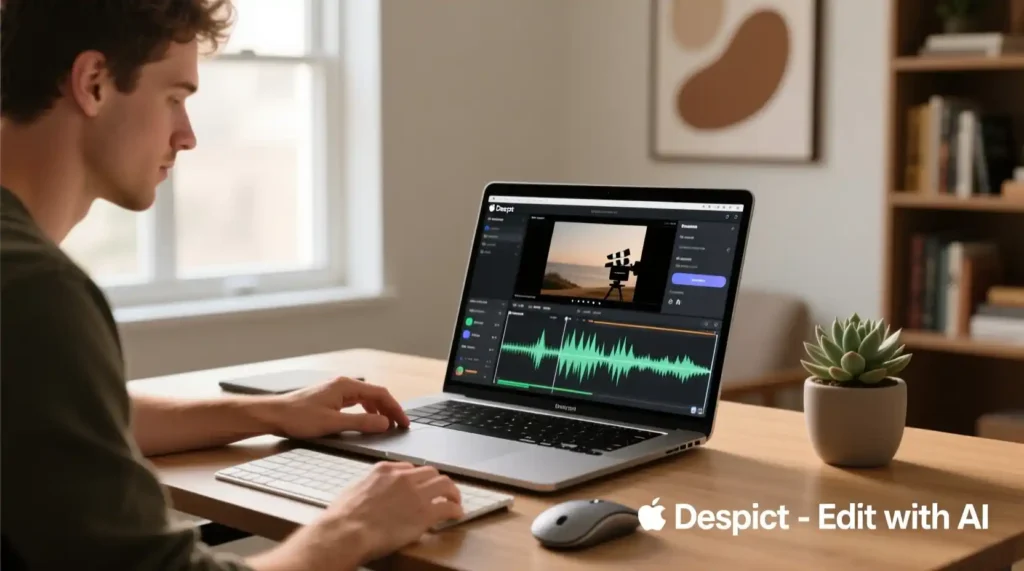
Understanding the Descript Interface
Descript’s UI is designed to be readable and low-friction. Here are the essential panels and how they map to your workflow.
Main workspace overview
- Script (Transcript) View: The central, text-first area. Your audio/video transcript lives here. Highlight, delete, or move text to edit the corresponding media.
- Timeline View: The traditional timeline appears when you need frame-level adjustments, multiple tracks, or visual placements of B-roll and overlays.
- Preview Window: Shows video playback and lets you review edits in real time.
- Media Panel: Where imported videos, audio, images, and screen recordings live.
- Inspector/Properties: Adjust clip-specific settings (volume, crop, transform, keyframes).
Timeline vs Script view — when to use each
- Use Script view for fast cuts, removing filler words, rearranging segments, or repurposing long-form content into short clips.
- Switch to Timeline view for precise trimming, layering B-roll, picture-in-picture, or custom transitions.
Essential tools you’ll use immediately
- Select & Delete: Click a phrase in the transcript and press delete to remove it from the final video.
- Split & Cut (keyboard shortcuts): Makes tight edits when you need to isolate an audio moment.
- Overdub & Replace Audio: Use to fix small scripted errors without re-recording (available on paid tiers).
- Studio Sound: One-click audio enhancement that reduces background noise and polishes voice quality.
- Markers & Speaker Labels: Tag speakers, mark chapters, and jump to key moments quickly.
Collaboration tools
- Share a project link for review or allow teammates to comment inline on the transcript. Real-time collaboration is available in team plans — great for distributed production workflows.
Quick Workflow Example: From Import to First Cut (overview)
Before we jump into full step-by-step editing in Part 2, here’s a short, mobile-friendly checklist of the typical first-minute workflow you’ll use:
- Create a new project and name it with the show/date (good for organization).
- Import your media (camera files, screen recordings, separate audio).
- Wait for automated transcription to finish (Descript runs it in the cloud).
- Scan the transcript and delete obvious filler words or flubs.
- Make your first rough cut by removing irrelevant lines and rearranging paragraphs like a script.
- Switch to timeline view to add B-roll, overlays, and precise trims as needed.
This lightweight approach — transcript-first, timeline-second — is the core to mastering how to use Descript for video editing. It lets you iterate on the story without getting bogged down in micro-edits.
Now that you’ve installed Descript and explored its interface, let’s dive into how to use Descript for video editing in practice. This part walks you through importing media, creating transcripts, text-based video editing, cleaning audio, and layering visuals. By the end of this section, you’ll be able to turn raw footage into professional-quality videos — without feeling like you’re learning complex video software.
How to Import and Organize Your Video Files
Importing Media
Descript makes importing fast and intuitive.
Step 1: Upload video files
Open your project and click “Add Media” or simply drag and drop files into the workspace. Descript supports common formats like MP4, MOV, WAV, and MP3.
Step 2: Import audio tracks
If your podcast or video uses separate microphones or a multi-cam setup, upload each track. Descript automatically syncs them using waveform alignment — perfect for multitrack editing.
Step 3: Screen recording in Descript
You can record your screen and webcam directly inside the app. Click “Record” → “Screen + Camera” to capture tutorials or demos. This feature is great for creating YouTube how-tos, product walkthroughs, or course lessons.
Supported file formats:
- Video: MP4, MOV, AVI
- Audio: MP3, WAV, M4A
- Images: PNG, JPG
- Captions/Subtitles: SRT
Project Organization
A cluttered workspace slows you down. Keep your projects organized with simple systems.
Creating folders — Use folders by topic or series (e.g., “Podcast Season 2,” “YouTube Tutorials”).
Naming conventions — Add clear names: “Ep3-Interview-JaneDoe.mp4.”
Managing multiple projects — Archive completed ones and back them up to Descript’s Cloud or your preferred storage.
💡 Pro Tip: Use Descript’s search function to find clips using transcript keywords — perfect for content repurposing.*
Step-by-Step Guide: Editing Videos in Descript
Step 1 – Automatic Transcription
Once your media is uploaded, Descript automatically starts transcribing your audio or video.
How it works:
Descript uses AI to generate an accurate transcript of your dialogue. The text and video are linked frame-by-frame.
Accuracy tips:
- Use clean audio or apply the Studio Sound enhancement first.
- Assign Speaker Labels (Descript can auto-detect speakers).
- Manually correct misheard words if needed — the corrections instantly sync with your video.
Why it matters:
This automated transcription not only saves time but also forms the foundation of Descript’s text-based video editing workflow.
Step 2 – Text-Based Editing
Here’s where Descript shines. Forget timeline razor cuts — you edit your video by editing text.
Editing video by deleting text
Highlight any unwanted sentences in the transcript and hit delete. The corresponding video/audio clip is instantly removed.
Cut and paste functionality
Move paragraphs or sentences to change the order of clips. You can even rearrange scenes by dragging transcript sections.
Rearranging scenes for clarity
Perfect for interview clips or vlogs — reorder topics to improve storytelling.
Semantic keyword: text-based video editing
🎯 Think of it as writing your story — except every keystroke edits the video too.
Step 3 – Removing Filler Words and Pauses
We all say “uh,” “um,” and “like” — Descript removes them automatically.
Automated filler word removal:
- Go to Edit > Remove Filler Words.
- Descript detects “um,” “uh,” “you know,” and removes them in seconds.
- Review before applying — sometimes filler words add natural flow.
Manual cleanup:
Use find-and-delete in the transcript for repeated words or long pauses.
Shortening gaps:
Trim silent sections visually in the timeline for a tighter edit.
Semantic keyword: remove filler words
Step 4 – Adding Visual Elements
Now that your spoken content is clean, add visuals for a professional touch.
Inserting images and GFX:
- Drag and drop images or logos directly onto the timeline.
- Great for brand logos, intro cards, or supporting visuals.
Text overlays and titles:
- Use the “T” icon to insert text captions or lower thirds.
- Adjust font, color, and animation from the right panel.
Lower thirds:
Show speaker names or key messages using the built-in templates.
Transitions:
Add fades or cuts between scenes with simple dropdown tools — you don’t need to keyframe anything manually.
🖼️ Add images and B-roll every 30–40 seconds to maintain viewer engagement — Descript’s timeline makes this easy.
Step 5 – Audio Enhancement
Good audio makes or breaks your video. Descript includes several tools to improve clarity.
Studio Sound feature explained:
This AI-powered tool enhances voice quality, removes echo, and balances tone. Toggle it on from the audio settings — the difference is dramatic.
Volume leveling:
Normalize loud and quiet sections automatically for consistent volume.
Background noise reduction:
Use Descript’s noise filter to remove hums or keyboard clicks.
Semantic keyword: Studio Sound feature
🎧 Studio Sound can make a simple home recording sound like it was made in a professional studio.

Step 6 – Working with Multiple Tracks
Descript also handles multitrack editing, perfect for podcasts, interviews, or multi-camera setups.
Adding B-roll footage:
- Drag B-roll into the timeline above your main track.
- Adjust start and end points visually.
Picture-in-picture effects:
Add webcam overlays to screen recordings. Resize and position freely.
Split-screen layouts:
Use side-by-side layouts for interviews or reaction-style videos.
Semantic keyword: multitrack editing
Advanced Descript Features for Professional Edits
Overdub (AI Voice Cloning)
Ever spotted a word you misspoke after recording? The Overdub feature fixes it effortlessly.
How it works:
- Record a short voice sample (Descript trains an AI voice model).
- Type new words in the transcript; Overdub generates them in your voice.
Best practices:
- Use it for short corrections, not full narration replacements.
- Clearly label synthetic audio if publishing commercially.
Semantic keyword: Overdub feature
Green Screen Removal
For creators using visual backdrops:
- Import footage with a green screen.
- Apply Chroma Key from the effects panel.
- Replace the background with images or videos — great for branded tutorials.
Templates and Presets
Save time and maintain consistency.
Using pre-made templates:
Choose from Descript’s templates for intros, lower thirds, or outro animations.
Creating custom templates:
Save your favorite layouts, captions, and branding for future projects.
Saving time with presets:
Apply the same audio and video settings across multiple episodes or videos.
Editing Specific Content Types in Descript
How to Edit Podcasts
Descript began as a podcast editing software, and it still excels here.
Multi-speaker setup: Label each voice, use multitrack view for smooth fades.
Chapter markers: Add timestamps directly in the transcript for easier navigation.
Show notes: Export the cleaned transcript to create SEO-friendly show notes.
Creating YouTube Videos
Aspect ratio settings (16:9): Standard YouTube format.
Thumbnail creation: Take frame screenshots from Descript for thumbnails.
Export settings for YouTube: Choose 1080p, MP4 format for best results.
Making Social Media Reels
Descript makes short-form editing seamless.
Vertical video formatting (9:16): Switch canvas size before exporting.
Captions for silent autoplay: Auto-generate captions from your transcript.
Optimizing for Instagram and TikTok: Trim to under 60 seconds, add text overlays, and export as MP4.
You’ve learned the core of how to use Descript for video editing — from importing footage to text-based edits, audio cleanup, and adding visuals. In this final section, we’ll cover exporting and publishing, troubleshooting issues, pricing options, alternatives, and practical editing shortcuts to boost your workflow efficiency. Finally, we’ll wrap up with a powerful conclusion that ties everything together.
Exporting and Publishing Your Video
After polishing your video, it’s time to share it with the world. Descript simplifies this with flexible export and publishing options.
Export Settings
When your edit is complete, click “Publish” or “Export”. You can export directly or share an interactive web link.
Key export settings:
- Resolution options: Choose between 720p, 1080p, or 4K (depending on your plan).
- File formats: MP4 for video, WAV or MP3 for audio-only exports.
- Compression settings: Use “High” for YouTube uploads; “Medium” for social sharing.
Other export choices:
- Subtitles: Include burned-in captions or export SRT files.
- Audio mixdown: Combine multiple tracks automatically.
- Export transcript: Perfect for SEO-rich blog posts or podcast show notes.
💡 Pro tip: Export both video and transcript — this improves accessibility and boosts content discoverability online.*
Direct Publishing
Descript integrates with major platforms for frictionless sharing.
YouTube integration:
- Connect your channel directly from Descript.
- Add video title, description, and tags.
- Upload directly without re-rendering in another app.
Social media exports:
Quick-share optimized clips for LinkedIn, Instagram, or TikTok with proper aspect ratios.
Cloud storage options:
Save finished videos to Google Drive, Dropbox, or Descript’s cloud.
Semantic keywords: screen recording Descript, video editing software, content creation tool
Descript Tips and Shortcuts for Faster Editing
Speed matters when you’re producing consistent content. Here are some workflow optimization techniques:
Essential keyboard shortcuts:
Cmd/Ctrl + K: Split clipCmd/Ctrl + Shift + F: Remove filler wordsCmd/Ctrl + Shift + S: Toggle Studio SoundCmd/Ctrl + E: Export
Workflow optimization:
- Use templates for consistent branding.
- Build Overdub libraries for recurring corrections.
- Label speakers early to simplify editing in long podcasts.
Time-saving features:
- Detect Filler Words and delete in one click.
- Use Find and Replace in transcripts to edit repeated phrases.
- Leverage Markers to note changes or collaborate with others.
Common mistakes to avoid:
- Forgetting to relink missing media before export.
- Overusing Overdub — keep it natural.
- Ignoring project organization (folders, labels).
⚡ Descript’s power lies in speed + clarity. Use it to focus on story flow, not technical trimming.
Troubleshooting Common Descript Issues
Even the best software has hiccups. Here’s how to fix the most common ones.
Transcription Accuracy Problems
Fix:
- Use Studio Sound before transcription for cleaner input.
- Manually edit misheard words.
- Train Overdub for better voice consistency in corrections.
Performance and Lag
Fix:
- Close unused apps.
- Split long projects into smaller sequences.
- Use lower playback quality when previewing.
Audio Sync Issues

Fix:
- Check for mismatched frame rates.
- Re-import source files if alignment drifts.
- Disable auto-leveling temporarily during review.
Export Problems
Fix:
- Ensure all media files are linked.
- Try exporting in a different resolution.
- Update Descript to the latest version — many export bugs are patched quickly.
Descript Pricing: Which Plan Is Right for You?
Descript offers flexible tiers depending on your editing needs.
Free Plan
- Limited transcription minutes
- Watermarked exports
- Great for testing Descript
Creator Plan (~$12/month)
- Removes watermark
- Adds screen recording
- Access to Studio Sound
- More transcription hours
Pro Plan (~$24/month)
- Access to Overdub (AI voice cloning)
- Unlimited filler word removal
- High-resolution video export
- Advanced collaboration features
Team Plan
- Ideal for production teams
- Shared workspaces and real-time commenting
💰 If you’re a solo creator or YouTuber, start with the Creator plan — it unlocks nearly all essential features at a great value.
Alternatives to Descript (Brief Comparison)
Descript is not the only video editor — but it’s one of the most unique.
| Software | Strengths | Best For |
|---|---|---|
| Adobe Premiere Pro | Industry-grade effects, precise timeline editing | Professional filmmakers |
| Final Cut Pro | Smooth on Mac, cinematic color grading | Apple creators |
| DaVinci Resolve | Free tier, strong color correction | Cinematic and documentary editors |
| Descript | Text-based editing, AI tools, podcast integration | Content creators & podcasters |
When to choose Descript:
If your workflow revolves around spoken content, podcasts, or YouTube tutorials, Descript’s text-based video editing and automated transcription features save hours.
Frequently Asked Questions
Q: Is Descript good for video editing?
Yes! Descript is excellent for editing talking-head videos, podcasts, and tutorials. Its text-based system allows faster edits than traditional timeline editors.
Q: Is Descript free to use?
Yes, there’s a free version with limited transcription and watermarked exports. Paid plans start affordably for individual creators.
Q: Can you edit video in Descript like a traditional editor?
Yes. Besides text-based editing, Descript includes a timeline view for frame-precise adjustments and multitrack editing.
Q: What types of videos work best with Descript?
Interviews, screen recordings, tutorials, podcasts, and social media clips where dialogue drives the story.
Conclusion
Now that you know how to use Descript for video editing, you’re equipped to streamline your entire content creation process. Descript combines text-based editing with advanced features like Studio Sound, Overdub, and multitrack editing, letting creators focus on storytelling instead of technical complexity.
Whether you’re cleaning up a podcast, repurposing interviews into YouTube clips, or producing social reels, Descript helps you edit faster and smarter. Start with the free plan, explore its intuitive interface, and gradually expand into Overdub and team features as your projects grow.
The beauty of Descript lies in its simplicity — if you can edit a document, you can edit a video. So go ahead: download Descript today and experience how effortless professional editing can feel.
Pingback: How to Use Pictory AI to Turn Blogs into Videos - zadaaitools.com